Easy Crochet Christmas Bell Ornament Free Pattern
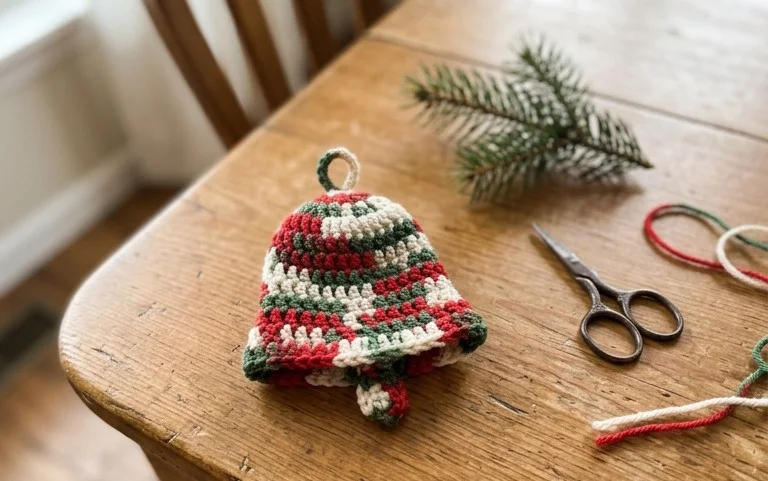
A small jingling bell with a soft, rounded shape fits perfectly in the palm of your hand and adds a classic, handmade charm to your holiday tree. This beginner-friendly project uses worsted weight yarn to create a dense fabric that holds its shape without needing a stiffening agent. You will practice the magic ring technique and simple single crochet spirals to build the bell body from the bottom up. It serves as an effective way to clean out your yarn scrap bin while producing thoughtful decorations that look great tied onto wrapped gifts or hung as traditional ornaments.
Why Crocheters Love It
This beginner-friendly project works up in under two hours, making it an ideal choice for last-minute gift-giving or a quick weekend craft session. Because it relies on basic single crochet stitches worked in a continuous spiral, you do not need to worry about complex counting or finishing seams at the end of every row. The repetitive nature of the construction offers a rhythmic, meditative experience for the maker, while the sturdy structure ensures the final piece holds its shape well over time. Since it requires less than one full skein of yarn, it is a practical way to use up those leftover partial balls of yarn sitting in your craft basket.
I managed to complete this pattern in a single afternoon while watching a movie. The instructions are very clear about the stitch counts, and my finished item looks exactly like the photos provided.
— Sarah, hobbyist crocheter
Pattern Overview & Skill Level
- Skill Level: Beginner
- Approximate Time: 1.5 to 2 hours
- Construction: Amigurumi-style continuous rounds using a magic ring for the base, followed by even growth and simple decreases to close the form.
- Finished Dimensions: 4 inches tall by 3 inches wide.
Materials & Supplies Needed
- Yarn: Worsted weight (#4) acrylic or cotton yarn. You will need approximately 40 yards of your main color.
- Hook Size: 4.0 mm (US G-6).
- Notions: Tapestry needle with a blunt tip, two 8mm safety eyes, polyester fiberfill stuffing, and a removable stitch marker.
- Yarn Substitutions: You may use a DK weight yarn for a smaller, tighter finished piece, or a bulky weight yarn if you increase your hook size to 5.5mm. Note that switching yarn weights will significantly alter the final dimensions and require more or less stuffing accordingly.
Stitch Guide & Abbreviations (US Terms)
- MR: Magic Ring. A method of starting a project by crocheting over an adjustable loop.
- ch: Chain.
- sc: Single crochet. Insert hook into stitch, yarn over, pull up a loop, yarn over, pull through both loops on hook.
- inc: Increase. Work 2 sc into the same stitch to add a stitch.
- dec: Decrease. Invisible single crochet decrease. Insert hook into front loops of the next two stitches, yarn over, pull through both front loops, yarn over, pull through remaining two loops.
- sl st: Slip stitch.
- st(s): Stitch(es).
Step-by-Step Pattern Instructions
Body
- Rnd 1: Make a MR and work 6 sc into the ring. (6 sts)
- Rnd 2: Work 2 sc in each st around. (12 sts)
- Rnd 3: [1 sc, 1 inc] repeat 6 times. (18 sts)
- Rnd 4: [2 sc, 1 inc] repeat 6 times. (24 sts)
- Rnd 5: [3 sc, 1 inc] repeat 6 times. (30 sts)
- Rnd 6 – 12: sc in each st around. (30 sts)
- Rnd 13: [3 sc, 1 dec] repeat 6 times. (24 sts)
- Rnd 14: [2 sc, 1 dec] repeat 6 times. (18 sts)
Insert safety eyes between Rnd 9 and Rnd 10, spacing them about 4 stitches apart. Begin filling the body firmly with fiberfill.
- Rnd 15: [1 sc, 1 dec] repeat 6 times. (12 sts)
- Rnd 16: [1 dec] repeat 6 times. (6 sts)
Finishing
Fasten off, leaving a 6-inch tail. Thread the tail onto your tapestry needle and weave it through the front loops of the remaining 6 stitches. Pull the thread tight to close the hole securely. Knot the yarn and hide the remaining tail inside the body of the project by pulling it through the stuffing with your needle.
Care & Washing Instructions
- Hand wash in cool water using a gentle detergent specifically formulated for knit and crochet items.
- Do not wring out the item; instead, gently press it between two towels to remove excess moisture.
- Lay the item flat on a dry towel in a well-ventilated area to air dry completely, reshaping it with your hands if necessary.
Pro Tips & Common Mistakes to Avoid
Maintain consistent tension throughout the project by keeping your working yarn slightly taut; if your tension is too loose, the stuffing will show through the gaps between stitches. Always place a stitch marker in the first stitch of every round to keep track of your count, as it is easy to lose your place in a continuous spiral. Weave in your yarn ends by passing the needle under the base of existing stitches rather than through the center of the yarn, which keeps the exterior looking smooth. If you decide to adjust the size, remember that adding more increase rounds will require significantly more yarn and fiberfill, and you must add an equal number of decrease rounds to ensure the piece closes correctly.
Frequently Asked Questions
Can I use a different weight of yarn for this pattern?
Yes, you can substitute the yarn, but be aware that using a lighter weight will result in a smaller final piece, while a heavier weight will create a larger item. You may need to adjust your hook size to ensure the fabric remains dense enough to hold the stuffing without gaps.
Is this project suitable for a total beginner?
This pattern is designed for those who know the basic single crochet stitch and are ready to practice working in the round. The simple shaping and limited number of techniques make it an excellent choice for a first amigurumi project.
How do I prevent gaps in my stitches when stuffing?
The best way to prevent gaps is to use a hook one size smaller than the yarn label recommends. This keeps the stitches tight and prevents the fiberfill from poking through the fabric.
Am I allowed to sell items I make using this pattern?
You are welcome to sell finished items made from this pattern in small quantities. Please provide credit to this design in your product listings or at your craft stall to support the work of the pattern creator.
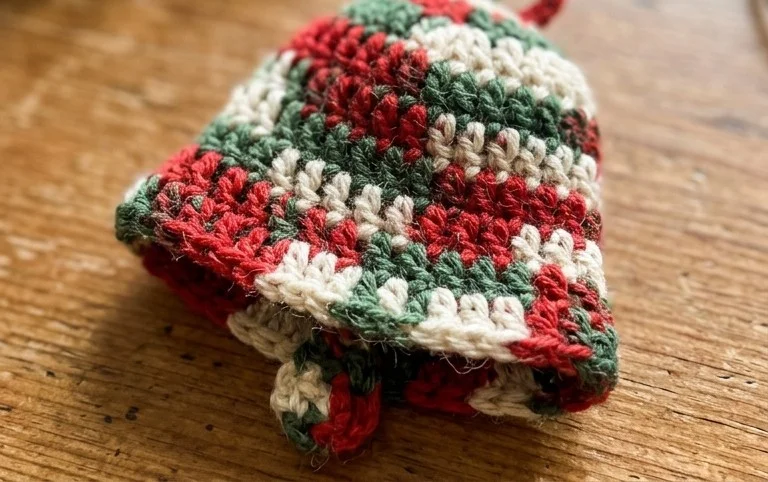
Your new bell looks wonderful hanging from a pine branch or tied onto a gift box to add a personal touch to your holiday decorations. You might experiment with using metallic thread held along with your yarn for extra shimmer or adjust your hook size to create smaller bells for a garland. Please share a photo of your finished work so others can see your color choices. You can find more free patterns and seasonal craft ideas on our blog pages throughout the coming months.