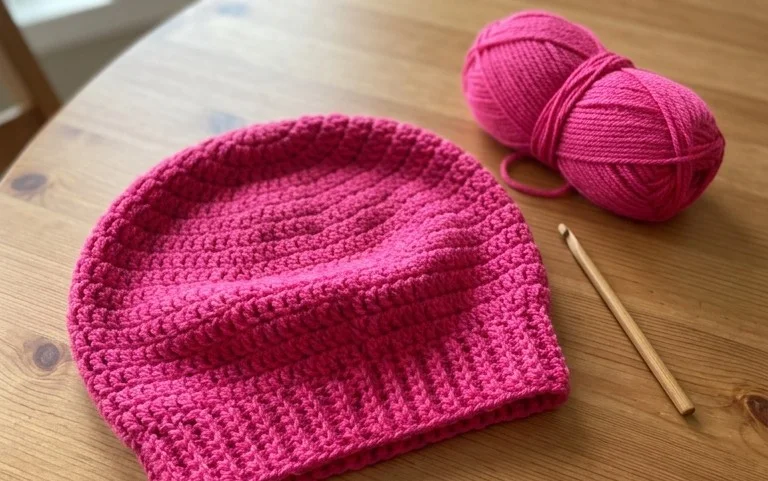
Easy Beginner Crochet Beanie Pattern: Step-by-Step Guide
This soft wool beanie sits snugly against your ears, keeping you warm during crisp morning walks without feeling tight or itchy. It is a reliable project for anyone who has just picked up a hook and wants to finish a wearable item in one sitting. You will focus on maintaining even tension while working in joined rounds, which is the foundational technique for most hats. Because the construction remains repetitive, your hands quickly settle into a rhythm that feels almost meditative. This hat serves as a reliable staple for your winter wardrobe or a thoughtful gift for a friend.
Why You Will Love This Pattern
This beginner-friendly project creates a classic crochet beanie using a simple, repetitive stitch pattern that works up surprisingly fast. Because it relies on basic half double crochet stitches, you do not need to memorize complex charts or difficult techniques to achieve a professional result. It is an ideal stash-buster for worsted weight yarn, allowing you to use up partial skeins while creating a functional accessory that fits comfortably for everyday wear. The texture is dense enough to provide warmth in cold weather but retains enough drape to feel soft against the forehead.
I finished this hat in one evening while watching a movie. It is the perfect pattern for someone learning to work in the round without feeling overwhelmed by stitch counts.
— Sarah, casual crafter
Pattern Overview & Skill Level
- Skill Level: Beginner
- Approximate Time: 2 to 3 hours
- Construction: Worked in joined rounds from the bottom up, beginning with a ribbed brim and moving into the main body of the hat.
- Finished Dimensions: Adult medium, fits heads 21 to 23 inches in circumference.
Materials & Supplies Needed
- Yarn: Worsted weight (#4), approximately 180 yards of 100% wool or acrylic blend.
- Hook Size: 5.0 mm (US H-8) for the main body and 4.5 mm (US G-7) for the brim.
- Notions: Tapestry needle for weaving ends, stitch markers to track the start of rounds, and a pair of sharp scissors.
- Yarn Substitutions: Cotton yarn will result in a heavier, less stretchy hat, while superwash wool will offer more elasticity and warmth. If you choose a heavier Aran weight yarn, your gauge will be larger, potentially resulting in a slouchier fit unless you reduce the total number of stitches in your starting chain.
Stitch Guide & Abbreviations (US Terms)
- ch: Chain
- sl st: Slip stitch
- sc: Single crochet
- hdc: Half double crochet
- hdc2tog: Half double crochet two stitches together (decrease)
- BLO: Back loop only
- st/sts: Stitch/stitches
Special Stitch: Half Double Crochet in Back Loop Only
To work a hdc in the BLO, yarn over, insert your hook into the back loop of the stitch from the previous row instead of under both loops. This creates a ribbed, knit-like appearance on the surface of your fabric.
Step-by-Step Pattern Instructions
Brim
Using the 4.5 mm hook, ch 9.
- Row 1: Sc in second ch from hook and in each ch across. Ch 1, turn. (8 sts)
- Rows 2-72: Sc in BLO of each st across. Ch 1, turn. (8 sts)
Join the two short ends of the brim with a row of sl st through both the foundation chain and the last row. Do not fasten off. Rotate the work 90 degrees to work along the long edge of the brim.
Hat Body
Switch to the 5.0 mm hook.
- Rnd 1: Ch 1, work 72 hdc evenly around the edge of the brim. Join with a sl st to the first hdc. (72 sts)
- Rnds 2-15: Ch 1, hdc in each st around. Join with a sl st to the first hdc. (72 sts)
- Rnd 16: Ch 1, (hdc in next 7 sts, hdc2tog) 8 times. Join with a sl st to the first hdc. (64 sts)
- Rnd 17: Ch 1, (hdc in next 6 sts, hdc2tog) 8 times. Join with a sl st to the first hdc. (56 sts)
- Rnd 18: Ch 1, (hdc in next 5 sts, hdc2tog) 8 times. Join with a sl st to the first hdc. (48 sts)
- Rnd 19: Ch 1, (hdc in next 4 sts, hdc2tog) 8 times. Join with a sl st to the first hdc. (40 sts)
- Rnd 20: Ch 1, (hdc in next 3 sts, hdc2tog) 8 times. Join with a sl st to the first hdc. (32 sts)
- Rnd 21: Ch 1, (hdc in next 2 sts, hdc2tog) 8 times. Join with a sl st to the first hdc. (24 sts)
- Rnd 22: Ch 1, (hdc in next st, hdc2tog) 8 times. Join with a sl st to the first hdc. (16 sts)
- Rnd 23: Ch 1, (hdc2tog) 8 times. Join with a sl st to the first hdc. (8 sts)
Finishing
Cut the yarn, leaving an 8-inch tail. Using a tapestry needle, weave the tail through the front loops of the remaining 8 stitches. Pull the tail tight to close the hole at the crown. Secure the yarn on the inside of the hat and trim any excess.
Care & Washing Instructions
- Hand wash in cool water using a gentle wool-safe detergent to maintain the integrity of the fibers.
- Lay the hat flat on a clean towel away from direct heat to air dry, which prevents the yarn from stretching out of shape.
- Avoid using a tumble dryer, as heat can shrink natural fibers and cause synthetic fibers to lose their elasticity over time.
Pro Tips & Common Mistakes to Avoid
Maintain consistent tension by ensuring your yarn flow remains steady, especially when transitioning between the smaller brim hook and the larger main body hook. Use a stitch marker at the start of every round to keep track of where your rounds end, preventing the common mistake of adding or skipping stitches. To weave in your ends invisibly, feed the yarn tail through the underside of the stitches in the same direction they were worked, then reverse direction for the final inch to lock the yarn in place. You can adjust the size of the hat by increasing or decreasing your initial chain count for the brim, but ensure the number is a multiple of eight to keep the decrease rounds even.
Frequently Asked Questions
Can I substitute a different yarn weight for this pattern?
Using a different yarn weight will significantly change the finished size of the hat. If you use a lighter yarn, you will need to increase the number of stitches in your foundation row to match the circumference requirements.
Is this project suitable for a complete beginner?
Yes, this project only requires three basic stitches: chain, single crochet, and half double crochet. It is an excellent way to practice working in joined rounds without needing to manage complex stitch patterns.
How do I resize this hat for a child?
To make the hat smaller, decrease the initial number of foundation chains for the brim in increments of eight. For example, starting with 64 stitches instead of 72 will result in a snugger fit appropriate for a small head.
Can I sell finished items made from this pattern?
You are welcome to sell finished items created from this pattern. I only ask that you credit the original design to my shop and use your own photographs when listing the items for sale.
Seeing your finished beanie come off the hook with clean, even rows is a satisfying way to end your afternoon. If you want to change the look, try holding two strands of a lighter weight yarn together for a bulky, heathered effect that works up even faster. Once you secure your ends and fold up the brim, consider taking a clear photo to share with our community. Please visit the rest of our pattern library to find other projects that help you practice new stitches and grow your collection.