2026 Free One Skein Crochet Patterns: Easy Beginner Guide
Soft, squishy yarn held in your hands turns into a cozy accessory before the weekend ends. These designs feel substantial yet work up fast because they use exactly one skein of standard yarn. They suit beginners building confidence with basic stitches and makers wanting quick gifts without leftover supplies cluttering their craft space. You will find that mastering simple rounds or flat rectangles provides a professional finish without needing complex hardware or specialty tools. Every project here focuses on stitch consistency and yarn tension, ensuring your final piece looks uniform and polished. Grab your favorite hook and prepare to transform that lonely leftover skein into something warm.
Why You’ll Love This Pattern
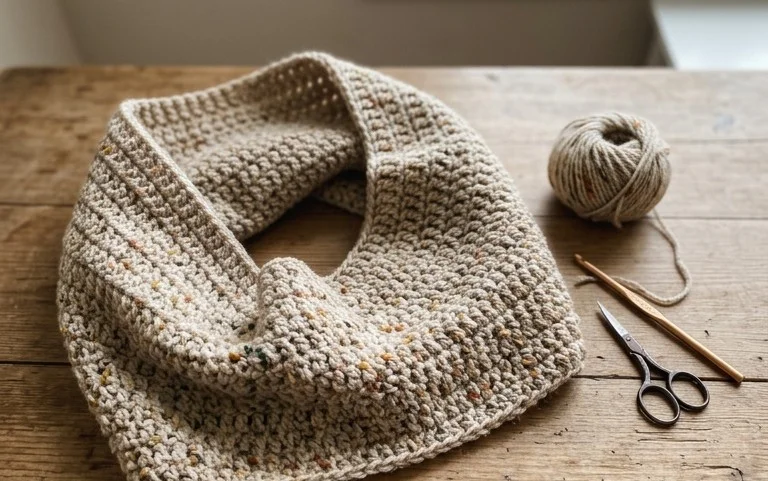
This classic crochet beanie pattern relies on simple half double crochet stitches worked in the round to create a clean, ribbed appearance without the complexity of post stitches. The project works up quickly because the yarn weight provides enough coverage to finish in a single weekend. Because the fabric is worked in the round from the bottom up, you avoid the hassle of seaming panels together at the end. You can easily adjust the size by changing the starting chain count, making this an ideal template for the whole family.
I managed to finish this hat in two evenings while watching movies. The instructions were very easy to follow and the sizing was perfect for a standard adult head.
— Sarah, hobbyist crafter
Pattern Overview & Skill Level
- Skill Level: Beginner
- Approximate Time: 3 to 4 hours
- Construction: Worked in continuous rounds from the bottom brim upward, with simple crown decreases at the top.
- Finished Dimensions & Sizing: Fits average adult head (21-23 inch circumference). Finished hat height is approximately 9 inches.
Materials & Supplies Needed
- Yarn: Worsted weight (#4), 100% acrylic or wool blend, approximately 200 yards.
- Hook Size: 5.0 mm (US H-8).
- Notions: Tapestry needle for weaving ends, stitch marker to track the start of rounds, scissors.
- Safe yarn substitutions: You may use cotton yarn, but be aware that it has less elasticity than wool or acrylic. If using cotton, you might need to add an extra increase round to ensure the brim fits comfortably over the head.
Stitch Guide & Abbreviations (US Terms)
- ch = chain
- st/sts = stitch/stitches
- hdc = half double crochet: Yarn over, insert hook into stitch, pull up a loop, yarn over, pull through all three loops on the hook.
- inc = increase: Work 2 hdc into the same stitch.
- dec = decrease: Yarn over, insert hook into stitch, pull up a loop, insert hook into next stitch, pull up a loop, yarn over, pull through all four loops on the hook.
- sl st = slip stitch: Insert hook into stitch, pull up a loop and pull directly through the loop on your hook.
- BLO = back loop only: Work the stitch into the rear loop of the stitch instead of both loops.
Step-by-Step Pattern Instructions
Hat Body
- Rnd 1: Start with a magic ring or ch 4 and sl st to first ch to form a ring. Ch 1, work 10 hdc into the center of the ring. Sl st to the first hdc to join. (10 sts)
- Rnd 2: Ch 1, inc in each st around. Sl st to join. (20 sts)
- Rnd 3: Ch 1, *inc in next st, hdc in next st; repeat from * around. Sl st to join. (30 sts)
- Rnd 4: Ch 1, *inc in next st, hdc in next 2 sts; repeat from * around. Sl st to join. (40 sts)
- Rnd 5: Ch 1, *inc in next st, hdc in next 3 sts; repeat from * around. Sl st to join. (50 sts)
- Rnd 6: Ch 1, *inc in next st, hdc in next 4 sts; repeat from * around. Sl st to join. (60 sts)
- Rnds 7-20: Ch 1, hdc in each st around. Sl st to join. (60 sts)
Brim and Finishing
- Rnd 21: Ch 1, working in BLO, hdc in each st around. Sl st to join. (60 sts)
- Rnd 22: Ch 1, hdc in each st around. Sl st to join. (60 sts)
- Final Steps: Fasten off, leaving a 6-inch tail. Weave the yarn through the final stitches of the last round to pull the edge slightly inward if desired, then secure the yarn on the inside of the hat. Trim excess yarn.
Care & Washing Instructions
- Hand wash in cool water using a mild detergent specifically designed for wool or synthetic fibers.
- Do not wring out the hat; instead, lay it flat on a clean towel and roll it to absorb excess moisture.
- Reshape the hat while damp and allow it to dry completely on a flat surface away from direct sunlight or heat sources.
Pro Tips & Common Mistakes to Avoid
- Maintain consistent tension throughout the project by keeping your yarn feed smooth. If your stitches look uneven, try going down half a hook size to tighten the loops.
- Always place a stitch marker in the first stitch of every round. Because this pattern is worked in rounds joined with a slip stitch, it is easy to accidentally skip the first stitch or add an extra one.
- When weaving in ends, run your tapestry needle through the back loops of the stitches on the inside of the hat for at least two inches to ensure the end does not work its way out.
- To adjust the size, add or subtract stitches in increments of 5 during the increase rounds. Increasing the total number of stitches by 5 will make the hat approximately 1 inch wider.
Frequently Asked Questions
Can I use a larger hook size for this pattern?
Using a larger hook will result in a looser, more open fabric. While this works well if you want a slouchy fit, you may need to increase the number of stitches in your initial rounds to maintain the same final width.
Is this pattern suitable for complete beginners?
Yes, this is an excellent first project. It uses only one basic stitch, the half double crochet, and focuses on simple increases, making it perfect for practicing your tension and counting.
How do I know if the hat will fit correctly?
Measure the head circumference of the intended wearer. The hat should have about 1 to 2 inches of negative ease, meaning the hat circumference should be slightly smaller than the head to ensure a snug fit.
Can I sell items made from this pattern?
You are welcome to sell finished hats made using this pattern. Please credit the original design and use your own photographs when listing items for sale online.
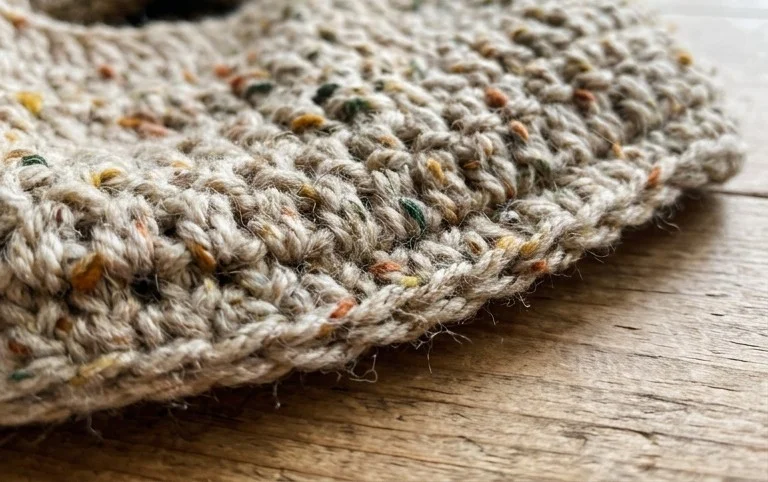
Completing a project with just one skein provides a sense of accomplishment that feels both quick and meaningful. You might consider adding a bright contrasting border to your finished hat to make it truly your own, or swap the standard wool for a variegated alpaca blend to alter the texture entirely. Please tag your finished creations on social media so others can see your color choices. Browse the rest of the blog for more patterns that utilize a single ball of yarn for your next afternoon hobby session.