Easy Granny Square Crochet Pattern: Step-by-Step Guide
Soft wool loops form a dense, structured square that sits comfortably in your palm, offering a satisfying weight and crisp, geometric edges. This project provides a steady flow of motion that keeps your hands busy while you settle into a quiet afternoon. Beginners find confidence here because the process requires only basic chain and double crochet stitches repeated in a controlled, predictable rhythm. You will build these squares by working from the center outward, which creates a clean finish that avoids messy transitions. Making these squares feels productive and calming, turning small leftover scraps of yarn into a cohesive, usable fabric that you can eventually join into larger, warm blankets or functional carry-all bags.
Why This Project Is Worth Making
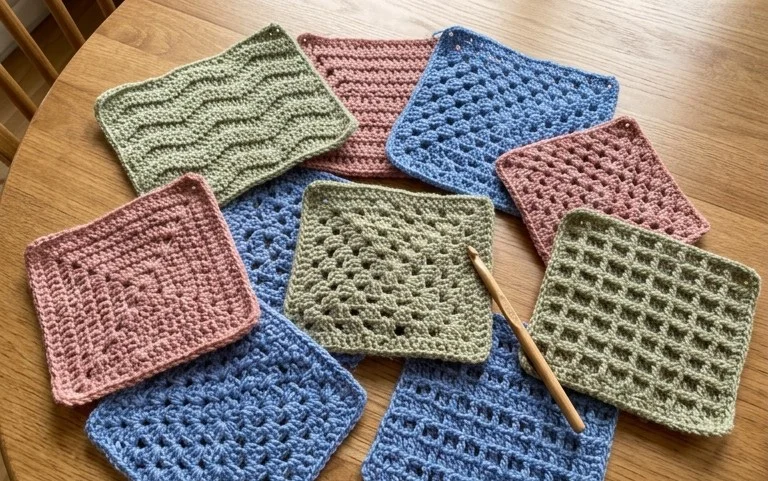
This beginner-friendly classic granny square project offers a rhythmic, repetitive stitch pattern that makes it ideal for practicing tension control. You can complete a single square in about 20 minutes, allowing for quick gratification as your collection grows. Because it utilizes small amounts of yarn per round, it serves as a perfect method for clearing out remnants from your stash. The resulting square features a balanced, geometric aesthetic that works well for blankets, bags, or garments depending on how many you decide to join together.
I started these squares to use up my leftover yarn and the pattern is so simple I could finish them while watching movies without losing my place. — Sarah, crochet hobbyist
Pattern Overview & Skill Level
- Skill Level: Beginner
- Approximate Time: 20 minutes per square
- Construction: Worked in joined rounds, starting from the center and moving outward.
- Finished Dimensions: Approximately 5 inches by 5 inches using medium weight yarn.
Materials & Supplies Needed
- Yarn: Worsted weight (#4), acrylic or cotton blend, approximately 15 yards per square.
- Hook Size: 5.0 mm (H-8).
- Notions: Tapestry needle for weaving in ends, scissors, and a measuring tape.
- Yarn Substitutions: You may use DK weight yarn for a smaller square or bulky weight yarn for a larger square, though changing the weight will require a hook adjustment to maintain drape.
Stitch Guide & Abbreviations (US Terms)
- ch = chain
- st = stitch
- sl st = slip stitch
- dc = double crochet
- dc-cluster = 3 double crochet stitches worked into the same space
- sp = space
- MR = magic ring
Step-by-Step Pattern Instructions
Granny Square Body
- Rnd 1: Start with a MR. Ch 3 (counts as first dc throughout), 2 dc into the ring, ch 2, *3 dc into the ring, ch 2; repeat from * twice more. Join with a sl st to the top of the initial ch 3. (12 dc, 4 ch-2 spaces)
- Rnd 2: Sl st into the next two sts and into the first ch-2 corner space. Ch 3, 2 dc in same sp, ch 2, 3 dc in same sp (first corner made). *Ch 1, skip 3 dc, (3 dc, ch 2, 3 dc) in next ch-2 space; repeat from * twice more. Ch 1, sl st to the top of the initial ch 3. (24 dc, 4 ch-2 spaces, 4 ch-1 spaces)
- Rnd 3: Sl st into next two sts and into the first ch-2 corner space. Ch 3, 2 dc in same sp, ch 2, 3 dc in same sp. *Ch 1, 3 dc in the next ch-1 space, ch 1, (3 dc, ch 2, 3 dc) in next corner ch-2 space; repeat from * twice more. Ch 1, 3 dc in last ch-1 space, ch 1, sl st to top of initial ch 3. (36 dc, 4 ch-2 spaces, 8 ch-1 spaces)
- Finishing: Fasten off, leaving a 6-inch tail. Use a tapestry needle to weave the end securely into the back of the work.
Care & Washing Instructions
- Hand wash your finished pieces in cool water using a mild wool-safe detergent to preserve fiber integrity.
- Lay the squares flat on a clean towel and reshape them while damp to ensure the corners remain square during the drying process.
- Avoid using a tumble dryer, as high heat can shrink acrylic or natural fibers and distort the stitch definition.
Pro Tips & Common Mistakes to Avoid
Maintain consistent tension by ensuring your yarn feed remains smooth throughout the process, as tight stitches will cause the square to cup instead of laying flat. Always place a stitch marker in the first chain of your starting ch-3 to help identify the joining point at the end of every round. Weave your ends in by threading them through the base of the stitches on the back side of the work in two different directions, which prevents them from pulling out over time. If you decide to adjust the size by adding more rounds, remember that each additional round will increase the yarn requirement significantly, so ensure you have enough yardage of your main color before starting.
Frequently Asked Questions
Can I use a different hook size for this pattern?
Yes, you can use a smaller hook to create a tighter, stiffer fabric or a larger hook for a drapier, more open texture. Be aware that changing the hook size will alter the finished dimensions of the square.
Is this pattern suitable for complete beginners?
This pattern is excellent for beginners because it relies on the double crochet stitch and clear, repeating corner sequences. It teaches you how to work in rounds and identify stitch spaces effectively.
How do I join these squares together into a larger item?
You can join them using a whip stitch or a single crochet seam. Both methods provide a sturdy connection that holds the weight of a larger blanket or bag well.
Am I allowed to sell items made from this pattern?
You are welcome to sell finished items you create, but please ensure you credit the design properly. Always check the specific terms provided by the designer regarding commercial use of their patterns.
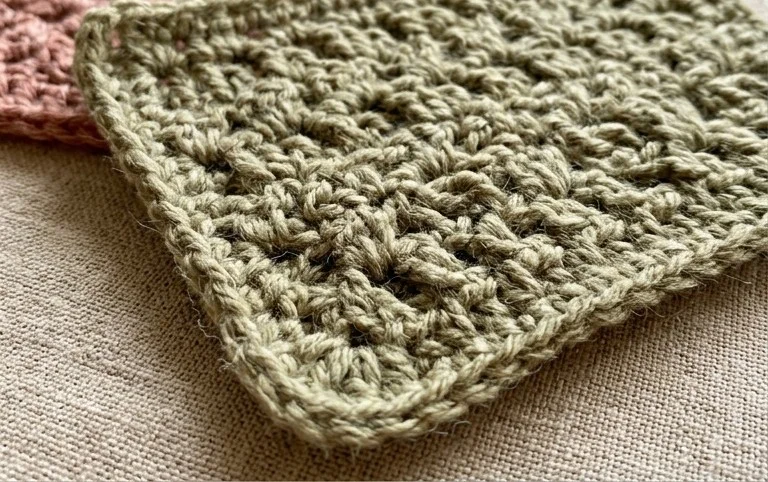
Your finished square now holds a firm shape and consistent texture that reflects your steady tension. Try holding two strands of thinner yarn together to create a thicker, marled appearance for a winter blanket. Sharing a photo of your work on Instagram or Pinterest shows others how these simple squares come together into larger pieces. We have more simple guides on our blog to help you build your confidence as you expand your collection of squares. Keep experimenting with different color combinations to see how every tiny change alters the visual outcome of your project.